Categories
LogWatcher Open Source

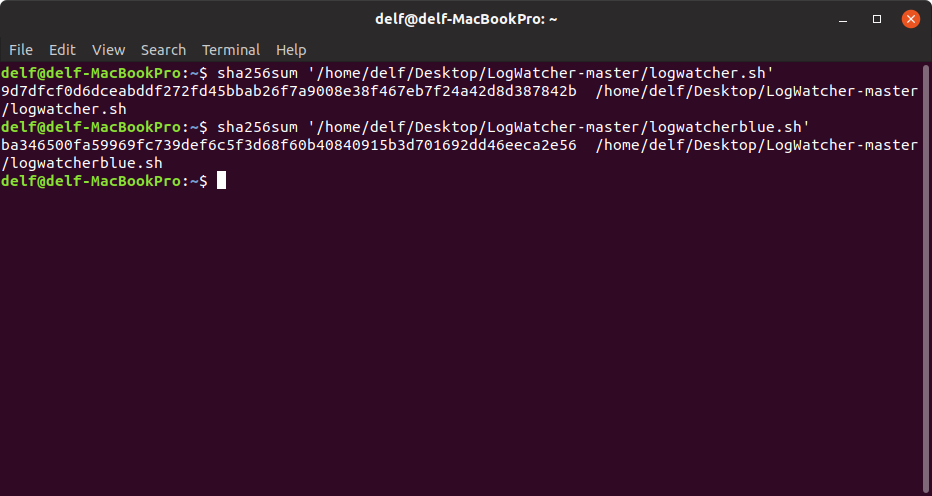
SHA-256 checksums for LogWatcher

The more I was thinking about it, since LogWatcher is a server utility and may occasionally  be run with escalated privileges, I thought it would be wise to publish checksums for integrity.

LogWatcher is a utility to perform very simple automated system monitoring and alerting. It is an ideal solution to use in conjunction with a web app that has a sound event logging architecture implemented. LogWatcher simply watches an error log file for any anomalous behavior. If someone attempts a log in, attempts to read the database, hack the URL, or any other adverse behavior that is landing in an error log file, LogWatcher can send an email alert to make you aware.

sha256sum for logwatcher.sh:
9d7dfcf0d6dceabddf272fd45bbab26f7a9008e38f467eb7f24a42d8d387842b

sha256sum for logwatcherblue.sh
ba346500fa59969fc739def6c5f3d68f60b40840915b3d701692dd46eeca2e56

The program sha256sum is designed to verify data integrity using the SHA256 (SHA2 family with a digest length of 256 bits). SHA256 hashes used properly can confirm both file integrity and authenticity. SHA256 serves a similar purpose to a prior algorithm recommended by Ubuntu, MD5, but is less vulnerable to attack.

Categories
cr3dov3r python

Credential Stuffing with Cr3dOv3r

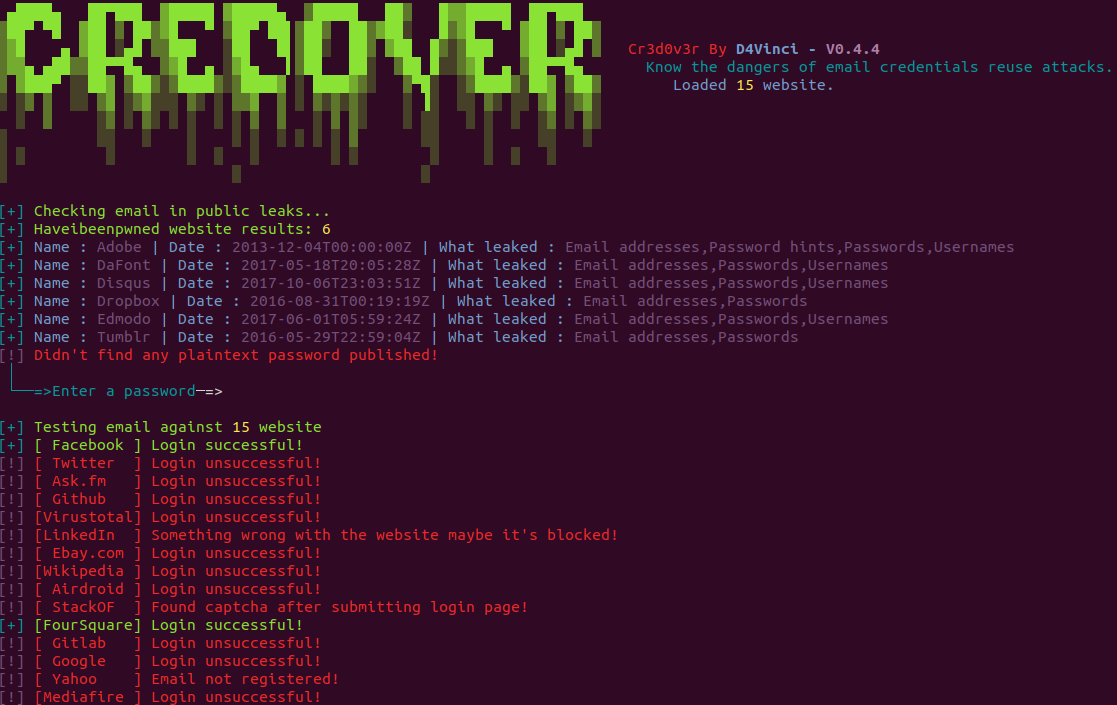
After the Dunkin Donuts credential stuffing breach I went on the lookout for a tool to search for and find leaked credentials.  I came across Cr3dOv3r, a nice little Python script that let’s you search for an email address to see which sites leaked it and when. It also let’s you search to find out if a plaintext password was leaked.  You can then enter the leaked password, or any password of your choosing, across a broad array of sites and the utility will automatically test to see if it is still valid.

A simple tool and could also be applied nicely in an enterprise environment to proactively detect email addresses that were leaked.

Categories
bash cron

Automating System Monitoring and Alerting with LogWatcher.sh

Over the past several weeks I completed this Lynda course about Bash scripting.  The course was great and I was able to put my learnings to use.  I wrote two handy bash scripts: the first is an open source project on GitHub I created called LogWatcher.  The second is still a work in progress, but can be used to scan database exports and system logs to identify if sensitive data is stored in plain text.  I’ll focus on describing the benefits of LogWatcher.

I wrote LogWatcher as a utility to perform automated monitoring and alerting for my password manager.  My password manager already has a great event logging architecture, but it doesn’t have any monitoring or alerting for adverse behavior.  So, LogWatcher simply watches the error log for any anomalous behavior.  If someone attempts a log in or someone attempts to read the database or otherwise try any URL hacking the error log will pick it up and then LogWatcher will send me an email alert.

There are really two versions of LogWatcher.  The first is designed if you are hosting your own server so it relies on pre-configuring SMTP.  The second flavor, LogWatcherBlue.sh, is intended to be uploaded to a web host and relies on the cPanel default email configuration.  Of course, you can always edit the script to send the email to your wireless carrier’s SMS gateway and receive a text message.

LogWatcher Design

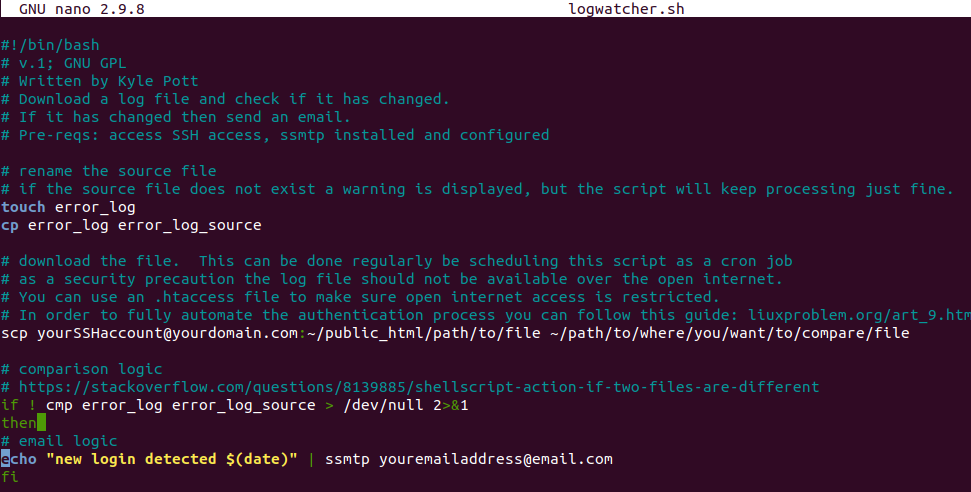
LogWatcher is a bash shell script, that does the following:

1.) Connects over SSH into the home directory of the web server.

2.) Downloads a copy of the error_log

3.) Compares the error_log to a previous iteration to see if the contents differ – indicating activity (expected or adverse) within the password manager.

4.) If activity is detected, an alert email is sent with the date and time.

5.) LogWatcher can be run ad-hoc, but it is really intended to be loaded into Cron and scheduled to run at any interval of your choosing.  I have it set to compare the error_log every minute which essentially provides continuous monitoring and alerting – overkill!

Learnings

It’s important for the error_log to be secured behind a .htaccess file.  If the error_log sat in the open internet it would defeat its purpose by providing any attacker with the kind of helpful information that would enable their attacks.  This is why we connect with SSH rather than over the open web.

Here’s a great technique to connect over SSH using the private key so you don’t have to enter your password manually.  Once this is configured LogWatcher runs in a fully automated fashion.

LogWatcher could be expanded for more features but two notable ones to consider would be: adding a grep search phrase to alert only when specific activity is detected.  LogWatcher could also clean up the error_log so it doesn’t grow so large.

I welcome your input and thanks for checking out LogWatcher!

Categories
aws Projects S3 WordPress

Moving a backup copy of WordPress over to AWS S3

Today I set out to make a complete backup of my WordPress blog, archive of the images and all.  I set out to move the backup from my domain host directly into Amazon S3.  Eventually, I plan to set a policy within S3 to move the files over to Amazon Glacier for even cheaper storage.  We’ll start with the AWS portion, then the WordPress portion.

AWS

I created a new user, me, and then I created a new group, with a new policy–essentially giving myself read, write, and credential creation permissions specifically for S3.

I headed over to S3 and created a new bucket for WordPress backups. I turned on logging, and I turned on encryption for the bucket.  One thing I found strange (and I might have this wrong) was that I had to name my bucket something unique relative to all S3 buckets and not just those in my account.  So for example, for some reason I had to name my bucket WordPress-s3s3s3 because WordPress and WordPress-s3 were already taken, but not by me.

I went back into Identity and Access Manager (IAM), created myself a new access ID and secret key and was ready to roll.

WordPress

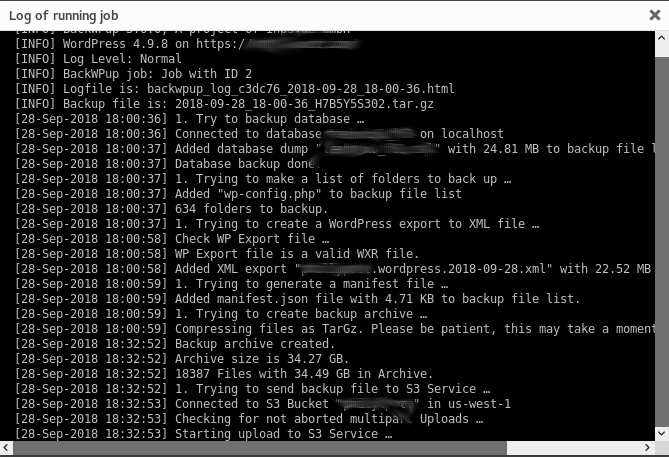
In WordPress I installed the extension BackWPup.  I then chose my correct AWS region (after a failed attempt), entered my key ID and secret key, picked my S3 bucket, elected to use encryption, chose a storage type as “rarely access,” to help control costs, and scheduled the job to run.  BackWPup allowed me to create a compressed archive and move the file over in 20MB chunks to prevent the transfer from being blocked by the ISP for being too large.

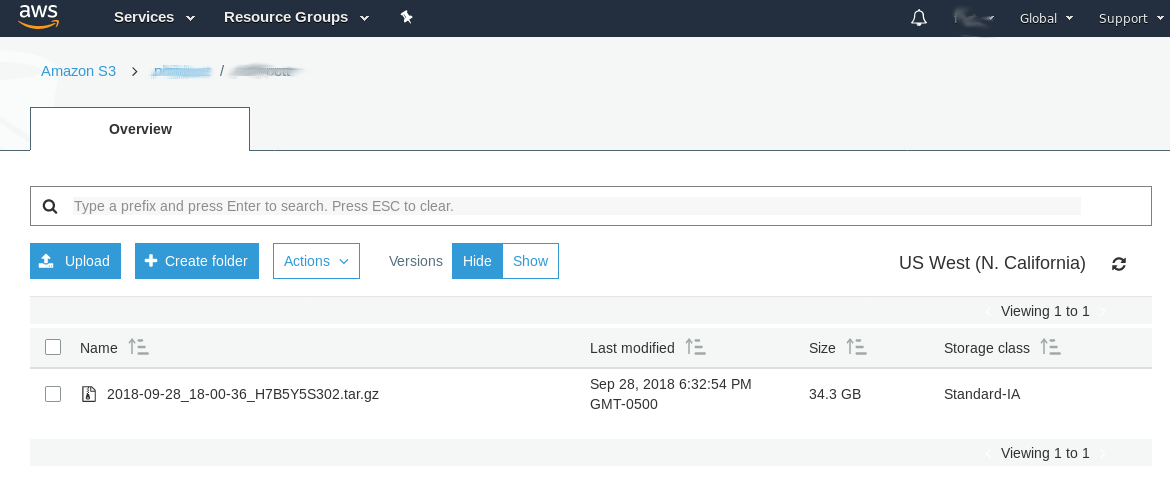
I changed the compression to TarGz after some research and found it offers the fastest compression ratio (though the remaining file is larger).  The compression alone has been running a long time – we have several thousand photos in the family blog and over 600 folders so I expect this could take over an hour just to compress.  We will see how it goes.  I also plan to monitor if I breach the free pricing tier at AWS.  The total compressed file size ended up over 34GB!!

Within BackWPup I set WordPress cron to schedule the job to run every month at 3am.

As I’ve said in my previous posts on AWS, I am amazed by the technology.  Once getting the permissions up and running, it has worked exceptionally well.  The reliability and speed are impressive.


Update

After compressing for about 30 minutes, I’m happy to say the job completed successfully and my backup is sitting safe and sound in S3!

Categories
aws ec2 ghost MySQL Projects ProjectSuccess Ubuntu WordPress

Ghost on AWS – success!


This is the third and final part of my first foray into AWS.  You can read part 1 and part 2.  AWS is great.  Getting access is secure and easy and you can’t beat free. AWS is incredibly quick at spinning up  new instances and once connected over SSH it is extremely fast – it rivals the feel of a local installation – almost no latency for me.

After getting Ubuntu installed, I spent the last few evenings attempting to install Ghost per these instructionsGhost is still an early work in progress. I had a lot of challenges. For example, the presence of a simple .config file blocked the installation until I deleted it.  During the installation, file premissions kept changing between my account and the newly installed Ghost account.  This is what ultimately blocked me completely.  No amount of chown or chmod adjustment would make Ghost work.  I tried every conceivable combination of ownership for /var/www/ghost including my account, the ghost account, and adding both to sudoers.  The only thing I stopped short of was changing the ownership to root which just didn’t seem appropriate.

I ended up abandoning my own attempt to install Ghost and instead tried out the Bitnami installation of Ghost.  This is a pretty cool capability within AWS – essentially an “app store” with Amazon Machine Images (AMIs) that you can install for free (or purchase).  The AMIs are customized for single or multiple needs.  In my case, Bitnami created a custom AMI with just Ghost installed.  I spun it up and had Ghost running in under five minutes.  All configuration worked out of the box – even punching a hole in UFW – Uncomplicated Firewall so you can navigate to the browser right out of the box and Ghost just works.  That is pretty cool! It would be great for the Ghost team to launch their own AMI instead of relying on Bitnami. I think Automattic should consider doing the same with WordPress.

Thoughts on Ghost

Ghost is built with a a good value proposition in mind: a more modern and faster architecture than WordPress and keeping the feature set to just the essential.  I agree that over time WordPress has developed some bloat – both in terms non-essential features and UI clutter.

Ghost has a few drawbacks that I’m sure the team is working on.  For one, the installation process needs to be streamlined.  I’m pretty proficient at Linux having over 15 years experience with Ubuntu and I couldn’t get the install to work.  There is a wide gap between the installation process for Ghost and the “World Famous” five minute install for WordPress.

The universe of available hosting platforms is very small.  I can understand this approach because Ghost is basically betting big on AWS – which makes sense to me.  The architecture of Ghost has a few drawbacks in my opinion.  For example, to install a new theme you have to reboot the server.  Not surprising, but since Ghost is so new, the ecosystem of plugins, themes, and other capabilities is nowhere near the universe of extensions available to WordPress.

In general, the UI and blogging experience is clean and simple, but not remarkably different than WordPress, in my opinion anyway.

A few benefits worth noting.  Relative to my current situation, Ghost on AWS allows full control of the server.  From a security perspective, this would allow me to control and monitor the entire server and firewall configurations.  That moves the responsibility for controls from my hosting provider to me.  I would like that.  As with all AWS appliances, Ghost has the potential to be a fair bit cheaper than a traditional WordPress blog on a regular domain host – but that depends hugely on the amount of traffic and purpose of the blog.

In total, Ghost is an interesting idea, I really like how it is “designed” for AWS.  But the install is too complex, the architecture needs some continuous improvement and the ecosystem needs to keep growing.  I would consider this project more frustrating than fun – messing with file permissions over and over not really all that enjoyable! For now I won’t be migrating this blog over to Ghost, but I’ll keep an eye on how the product matures over time.
 

Categories
aws ec2 ghost

More AWS

Read Part 1 here.  After waiting several hours, AWS was ready.  I started with a vanilla instance of Ubuntu 16.04.  I didn’t customize it at all–mostly because Amazon limits your configuration choices within the free tier, which makes sense to me.  It was amazing to see how much power you could really use.  For example, if money was no object, you could choose an instance that would support 72 virtual machines with 512 GB of memory.  Read that again, not 512GB of storage, but of actual memory.  Which I find truly amazing.  For comparison, the most beastly Mac I could customize on Apple.com maxed out at 64GB of memory, almost 9x less than what you can get through AWS.

Amazon offers the ability to create a public/private key pair to secure your virtual machine.  I downloaded a copy of my RSA Private Key .pem file and loaded it into my password manager for safekeeping.  I set my instance to allow inbound SSH traffic from only my IP.

Then one SSH command and I was in:

ssh -i 'path/to/my/.pem' user@IPv4 address

Once SSH’d in, I created a new user with sudo privileges and the real work to begin installing Ghost can begin.


Categories
aws ec2 ghost

First Foray Into AWS

Tonight I started the journey into Amazon Web Services (AWS) for the first time.  First, I signed up for a personal (free!) EC2 instance.  My plan is to install the Ghost blogging platform, add a domain name and DNS.  Ghost looks pretty cool.  Minimal, fast, and will give me a chance to get more familiar with an open source JavaScript architecture I have not used much: Ember.js, Node.js, and Express.js.

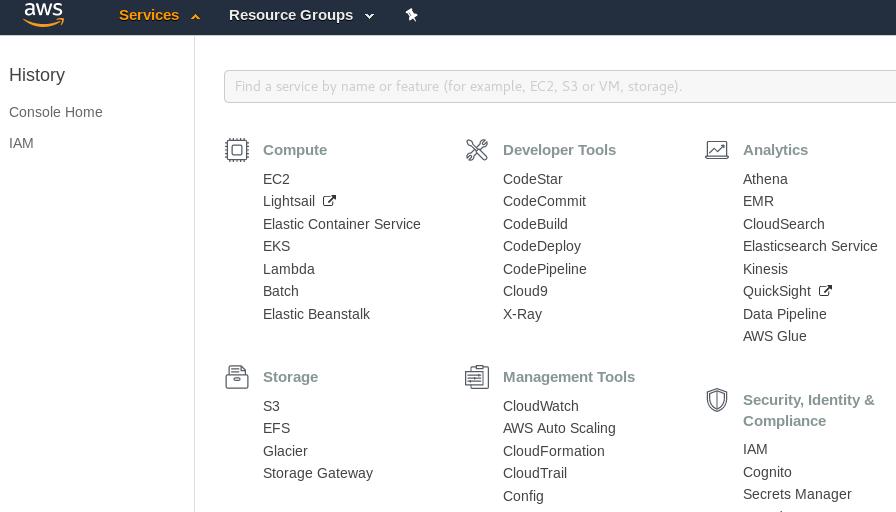
This project will require access to the AWS Command Line (CLI).  So the next step was to setup access management within EC2 and create an account with programmatic access which enables an access key ID and secret access key for the AWS API, CLI, and more.  AWS has nice features for creating user groups and permission boundaries.  I am essentially creating a synthetic root user, so no need to setup these capabilities yet.

Amazon takes up to 24 hours to spin up a new instance…so I wait…more soon.

Categories
brute forzabruta Kali Linux Projects ProjectSuccess Resource Discovery

More Resource Discovery with ForzaBruta.py

Been a busy summer, but I spent some time continuing the work I previously wrote about the brute-forcer, ForzaBruta.py.  This time working through the Lynda coursework to iterate on the brute-forcer to add convenience and analysis capabilities:

  • Take screenshots
  • Capture the MD5 checksum to compare the file contents
  • Record number of words and characters in each file and the time to load
  • Filtering and coloring based on return code
  • Filter for only certain file extensions.

These new capabilities rely on Selenium, a browser automation utility, and PhantomJS, a scriptable headless browser.  The convenience features are nice.  I have not been able to get automated screenshots to work.  All seemingly works well except a zero byte PNG file is created.  I am assuming the issue is related to the nuance of having Kali installed on a MacBook.  These graphics challenges are difficult to debug.  I experienced a similar graphics issue working with Hashcat last month as well.

That’s a long way for me to say I don’t think I’m going to invest the time to get the screenshot capabilities working.

Categories
brute forzabruta Resource Discovery

Brute Force Resource Discovery with Python and FuzzDB

I have been working through a Python course on Lynda.com and in the course we wrote a brute force resource discovery tool using Python.  You put in a URL and then you specify a dictionary word list, and the number of threads to run concurrently.  Then the brute forcer, named ForzaBruta.py, works through the word list and gives the page response codes (404, 403, 200, etc.).

I used the FuzzDB predictable filepaths, file and directory name brute forcer, Raft large directories lowercase dictionary list. I ran this on my main URL in hopes of seeing if I could discover the password manager I described twice previously. To my dismay, I was able to find the password manager within 15 minutes. I then narrowed the URL and re-ran ForzaBruta again. Bang, my password manager was discovered within 45 minutes. Mind you, the password manager was discovered without a single link going to the actual application and I did not have noteworthy entries in the robots.txt file.

This is a handy utility!

Learnings

1. First of all, remember that nothing truly hides in plain site on the Internet.

2. I should have picked directory structure names that were random and un-guessable via a brute force dictionary attack. I now have to make this update.

3.  My web host did not detect this attack and has no controls in place to prevent it.  Also the analytics I run on the site are delayed and they also do not do an adequate job recording the 404 end points – no help there.  While it would be pretty easy to create a honeypot to spot a brute force attack, none of the controls I have in place spotted this one.

Categories
DMitry Kali

Information Gathering with DMitry

DMitry is a nice little utility built into Kali. It’s a basic and easy to use utility, but not great. Usage is straight forward.

dmitry technicalagain.com

Base functionality is able to gather possible subdomains, email addresses, uptime information, tcp port scan, whois lookups, and more.

DMitry is worth the effort to simply punch in the command line but don’t expect great information back. First, just about everyone is using a whois proxy to conceal their personal information. Second, DMitry relies on search engines to try to find subdomains and email addresses. I specifically tested these features and because the search engines missed, DMitry missed, too. Simple and quick to use, but the information that comes back is not that helpful.