Categories
aws ec2 ghost MySQL Projects ProjectSuccess Ubuntu WordPress

Ghost on AWS – success!


This is the third and final part of my first foray into AWS.  You can read part 1 and part 2.  AWS is great.  Getting access is secure and easy and you can’t beat free. AWS is incredibly quick at spinning up  new instances and once connected over SSH it is extremely fast – it rivals the feel of a local installation – almost no latency for me.

After getting Ubuntu installed, I spent the last few evenings attempting to install Ghost per these instructionsGhost is still an early work in progress. I had a lot of challenges. For example, the presence of a simple .config file blocked the installation until I deleted it.  During the installation, file premissions kept changing between my account and the newly installed Ghost account.  This is what ultimately blocked me completely.  No amount of chown or chmod adjustment would make Ghost work.  I tried every conceivable combination of ownership for /var/www/ghost including my account, the ghost account, and adding both to sudoers.  The only thing I stopped short of was changing the ownership to root which just didn’t seem appropriate.

I ended up abandoning my own attempt to install Ghost and instead tried out the Bitnami installation of Ghost.  This is a pretty cool capability within AWS – essentially an “app store” with Amazon Machine Images (AMIs) that you can install for free (or purchase).  The AMIs are customized for single or multiple needs.  In my case, Bitnami created a custom AMI with just Ghost installed.  I spun it up and had Ghost running in under five minutes.  All configuration worked out of the box – even punching a hole in UFW – Uncomplicated Firewall so you can navigate to the browser right out of the box and Ghost just works.  That is pretty cool! It would be great for the Ghost team to launch their own AMI instead of relying on Bitnami. I think Automattic should consider doing the same with WordPress.

Thoughts on Ghost

Ghost is built with a a good value proposition in mind: a more modern and faster architecture than WordPress and keeping the feature set to just the essential.  I agree that over time WordPress has developed some bloat – both in terms non-essential features and UI clutter.

Ghost has a few drawbacks that I’m sure the team is working on.  For one, the installation process needs to be streamlined.  I’m pretty proficient at Linux having over 15 years experience with Ubuntu and I couldn’t get the install to work.  There is a wide gap between the installation process for Ghost and the “World Famous” five minute install for WordPress.

The universe of available hosting platforms is very small.  I can understand this approach because Ghost is basically betting big on AWS – which makes sense to me.  The architecture of Ghost has a few drawbacks in my opinion.  For example, to install a new theme you have to reboot the server.  Not surprising, but since Ghost is so new, the ecosystem of plugins, themes, and other capabilities is nowhere near the universe of extensions available to WordPress.

In general, the UI and blogging experience is clean and simple, but not remarkably different than WordPress, in my opinion anyway.

A few benefits worth noting.  Relative to my current situation, Ghost on AWS allows full control of the server.  From a security perspective, this would allow me to control and monitor the entire server and firewall configurations.  That moves the responsibility for controls from my hosting provider to me.  I would like that.  As with all AWS appliances, Ghost has the potential to be a fair bit cheaper than a traditional WordPress blog on a regular domain host – but that depends hugely on the amount of traffic and purpose of the blog.

In total, Ghost is an interesting idea, I really like how it is “designed” for AWS.  But the install is too complex, the architecture needs some continuous improvement and the ecosystem needs to keep growing.  I would consider this project more frustrating than fun – messing with file permissions over and over not really all that enjoyable! For now I won’t be migrating this blog over to Ghost, but I’ll keep an eye on how the product matures over time.


Categories
brute forzabruta Kali Linux Projects ProjectSuccess Resource Discovery

More Resource Discovery with ForzaBruta.py

Been a busy summer, but I spent some time continuing the work I previously wrote about the brute-forcer, ForzaBruta.py.  This time working through the Lynda coursework to iterate on the brute-forcer to add convenience and analysis capabilities:

  • Take screenshots
  • Capture the MD5 checksum to compare the file contents
  • Record number of words and characters in each file and the time to load
  • Filtering and coloring based on return code
  • Filter for only certain file extensions.

These new capabilities rely on Selenium, a browser automation utility, and PhantomJS, a scriptable headless browser.  The convenience features are nice.  I have not been able to get automated screenshots to work.  All seemingly works well except a zero byte PNG file is created.  I am assuming the issue is related to the nuance of having Kali installed on a MacBook.  These graphics challenges are difficult to debug.  I experienced a similar graphics issue working with Hashcat last month as well.

That’s a long way for me to say I don’t think I’m going to invest the time to get the screenshot capabilities working.

Categories
Projects ProjectSuccess Stripe WooCommerce WordPress

Build an eCommerce Website with WooCommerce

I spent the last three weeks designing, building, testing, debugging and putting the finishing touches on my first eCommerce website, complete with a full shopping cart experience and product purchase workflow.  One of my original project goals in launching this site was to learn how to take a payment online.  This turned out to be relatively straight forward.

This project would have been all but impossible in 1998 and still very, very challenging in 2008.  In 2018, I didn’t even write a single line of code.

I considered three possible approaches for this project: WordPress with WooCommerce, Bootstrap with a shopping cart add-in, and Shopify.  I ultimately decided on WooCommerce for two reasons: there was an overwhelming number of different shopping cart options within the Bootstrap community.  Although they are reasonably well supported, they couldn’t match the centralized level of community support available through WooCommerce.  The second reason I settled on WooCommerce was that the actual implementation of payment options were sufficiently abstracted from the code – which appealed to me.  Bootstrap is more customizable, but from what I could tell would require me to setup my own piping to test and establish the payment workflow.  Bootstrap may be more appropriate for a large scale legitimate online retailer, but seemed too complex than what I needed for a single product sole proprietorship.  I turned away from Shopify due to the recurring fee structure.

The installation of WooCommerce started by first installing WordPress, then adding the WooCommerce plug-in, and then using the guided WooCommerce installation process to pick payment options.  Originally, I decided to use Stripe and PayPal, but ended up backing off PayPal because I felt it was sufficiently redundant to the features included in Stripe.  Knowing data minification is a technique to reduce the possibility of breach I decided to just use one payment system and can always add in PayPal if warranted in the future.  WooCommerce has a very smooth installation process.

I finished by picking a theme and stylizing the site, integrating Google Analytics, customizing the product description and pricing, nailing down the cart and checkout workflows, and finishing with the “after sales” experience–which was basically just a follow up email.  I also setup  Google AdWords.  The pricing for Stripe is very affordable, something akin to 3% per transaction plus 30 cents and no recurring fees.  WooCommerce can make some improvements.

Learning

This was a good and straight forward project. WooCommerce is satisfactory, but not a great product yet.  There were a number of features I’d expect to be customizable right out of the box but instead required me to install additional plug-ins (some free and some proprietary) or do some hacking deep into the configuration files.  Three examples come to mind:

  1. To change the text on the “Add to Cart” button to say “Buy Now”
  2. To customize the “purchase confirmed” email
  3. To rearrange where the price shows up–whether above or below the product description

I was also disappointed that WooCommerce does not have a built in visitor tracking/analytics or marketing package-s-requiring me to, you guessed it, install yet another  batch of plug-ins.

After getting reasonably familiar with WooCommerce and participating in the community I noticed that it is not uncommon for administrators to have up to 30 or 40 different plug-ins running for a single WooCommerce site.  That makes debugging really hard, keeping the plug-ins up-to-date almost impossible, and adds a lot more opportunities for defects and breach.  Room for improvement, I think, for sure.

I didn’t have any real technical snags or frustrations, and I appreciated having the chance to learn about staging servers, testing the purchase process, applying a digital certificate (yet again), and a dash of search engine optimization and internet marketing.

It is truly amazing that we live in an era that a team of one guy can buy a domain name and hosting, get a digital certificate,  build a website and shopping cart, and can create an internet business in under three weeks for less than $80.  Eric Ries talks about this concept in his book The Lean Startup (summary) but it never really hit home for me how truly accessible technology is until I did this project.  We live in an amazing time!  This project would have been all but impossible in 1998 and still very, very challenging in 2008.  In 2018, I didn’t even write a single line of code.

Categories
Password Projects ProjectSuccess

Rolling My Own Password Manager (Part 2)

Continuing the review of how I implemented my own password manager, this is part two.  If you’d like to read part 1, you can do so here.  For somewhat obvious reasons I am not going to share the product name or the specific details about my implementation broadly here.  I would be glad to provide a bit more information: if you are so interested, leave a comment below and I can reply to your question directly.

I picked a product that fit the following desirables:

  • Standalone install on my own server – does not rely upon any third party
  • Open source and more than 10 years old.  Reasonably active developer community, penetration tested and uses proven encryption algorithms.
  • The installation was modular allowing me to customize the front- and back-ends I wanted to use.
  • The solution has logging in place so I can monitor log in attempts.

Stumbling Blocks

I mentioned in part 1 that I had two remaining control efficiencies which I can share now as I have those patched up.  The first issue was a silly mistake.  I had uploaded into my password manager the username and password for the server that hosts the password manager itself.  The issue here is that if the password manager was ever breached and the data stolen, by including the credentials of the host server, a malicious actor could then delete the password manager itself leaving me in a world of hurt.  I have since deleted those credentials.

The second issue I realized was that I never had a certificate attached to the server leaving me vulnerable to possible man-in-the-middle attacks.  Since one of the pleasures of using a password manager is that I can log in to copy/paste my credentials from my laptop or phone, the chance of using the password manager on a public access point is pretty high.  So I signed up for a free certificate from Let’s Encrypt to encrypt all the traffic.  My host made it extremely easy to apply the certificate.

Learnings

I had a few challenges in this project.  For one thing, I had a really difficult time forwarding all traffic to use https instead of http after I got my certificate installed.

I was finally able to get forwarding to work by adding the following lines to the .htaccess configuration file located at the root of the public directory.

RewriteEngine On
RewriteCond %{HTTPS} off
RewriteRule ^(.*)$ https://%{HTTP_HOST}%{REQUEST_URI} [L,R=301]
RewriteCond %{HTTPS} off
RewriteRule ^(<directory name>.*)$ https://www.domainname.com/sub-directory/sub-directory/sub-directory/etc.$1 [L,R=301]

This was particularly nasty because I had intended to use an .htpasswd configuration on the server to require “double credentialing” – one where you log into the directory containing the password manager and one where you log into the password manager itself.  The forwarding rules and the authentication rules for Apache kept stepping on each other and so I decided to abandon the directory authentication.  I definitely lost a lot of time and effort on this, but since directory level authentication in Apache isn’t really secure anyway, I decided to cut my losses.

Another less challenging but important learning was to turn off web crawling using a robots.txt file.  I realize this provides limited control utility, but why have search engines indexing my password manager?  That only creates more visibility and opportunity for malicious actors to find it and attempt exploits on it.  I know that malware crawlers can and do simply ignore robots.txt configurations, but I also know that utilities like amass use legitimate search engines that do respect robots.txt for intel.  Again, why make it easy?

Amass searches Internet data sources, performs brute force subdomain enumeration, searches web archives, and uses machine learning to generate additional subdomain name guesses.  I am going to do some experimentation with amass on my own servers to get more familiar.

Further Work

This has been a fun project.  I have learned a lot and vastly improved my web security and habits.  I have a few more ideas that I plan to work on related to the password manager:

  • I am going to minify the entire application by removing any reference to its name or any other identifiers in the source code.  It will still be possible for bots to fingerprint my use of the application, but it will take more work for any malicious actors because the basic search phrases and configurations won’t work on my instance.
  • I am still not pleased with the complexity of the passwords I used for the front and backends to communicate – so I’ll add more hardening there.  I am also in the process of turning two factor authentication on for all of my assets and need to finish up activating the last few.
  • I also need to come up with a backup plan for two factor authentication in the event that my phone is lost or broken.
  • I am going to experiment with John the Ripper to test the encryption and try to crack my own passwords.
  • I would like to set up a service to download my log file every few minutes, compare it, and send me a text message whenever there is new activity.  That way I am aware of any brute force login attempts that did not originate from me or any other approved user.
Categories
Password Projects ProjectSuccess

Rolling My Own Proper Password Manager (Part 1)

On previous posts here I shared my poor hygiene when it comes to password management (reusing the same password and not having passwords complex enough). I’m really happy to say I’ve made some major improvements. I’ve been meaning to roll my own password manager and I had a few requirements in mind.

1.) I wanted to host the web application myself on my own server so I could access it from any device and share access with my spouse.

2.) I wanted a password management application that would make it easy to generate maximum complexity usernames and passwords that I could copy and paste.

3.) I wanted the password manager to be free standing and not rely on any cloud or external services outside the scope of one of my servers.

4.) I wanted an open source solution, relying on established encryption protocols.

The primary attack vector that I am guarding against is breaches at the various third party sites I use – take the recent breach at MyFitnessPal as an example. This impacted me personally due to too much password-reuse. I am on a quest to eliminate both password and username re-use as well as start enabling two factor authentication on my email and sites with my financial assets. I am not concerned, primarily, about the physical security of my devices – which means I use Chrome and allow the passwords to be saved and even allow Chrome to sync across devices.

Overall the solution has a pretty nice experience. I use my password manager to generate random usernames and passwords and then copy and paste them when I need to. Chrome then saves the username and password and I don’t have to worry about it again.

In this post I am not going to share which solution I picked, where I installed it, or what customization I made in this post. I still have two control gaps in the solution I have implemented. I will share more details once I have those patched up in the next couple of weeks.

Categories
Projects ProjectSuccess Terminal TurboTerm

TurboTerm: The (Re-)Birth of My First Open Source Project


A quick note to mention I authored my first open source project today.  Not only was it a great chance to breathe some life into an old project of mine, but a chance to officially get comfortable using Git and GitHub.  More work and learning to do, but I am very proud to have a working (on Linux, anyway) terminal configuration utility.  I have included a todo file to capture the enhancements I plan to make. Enjoy!

TurboTerm is a simple terminal configuration file that makes the terminal more user friendly and welcoming to novices.

TurboTerm on GitHub.

Categories
chromebook chrx Projects ProjectSuccess Ubuntu Uncategorized

Dual Boot GalliumOS on a Chromebook


I had some success running Ubuntu on my Chromebook through Crouton, but I started running into issues. My hypothesis is that since aspects of the Linux kernel are shared between ChromeOS through chroot with Crouton, I couldn’t get a clean installation of Apache to run. I assume this was due to permissions. So I set out on yet another Linux adventure to do a true installation of Linux on the Chromebook.

I found a nice utility called chrx that made the installation very straight forward.

Installing Linux via chrx onto a new (or freshly recovered) Chromebook is a two-phase process:

The first phase reserves space on your SSD or other storage device for the new operating system, and then reboots.

The second phase installs your chosen distribution, and configures the new system according to your selected options.

The installation proceeded smoothly by typing the following into the terminal.
Run chrx: cd ; curl -Os https://chrx.org/go && sh go

Follow on-screen instructions to prepare your Chromebook for installation

Stumbling blocks

I have a Bay Trail chromebook. I should have paid more attention. I did not notice this the first time I installed so even though the install went smoothly, when I pressed CTRL + L to launch into Ubuntu, it was non-responsive and would boot back into ChromeOS. The issue was that I needed to update my firmware. I found this nice firmware update script. I chose the first option which installed the RW_LEGACY firmware with a newer/working/customized version of the SeaBIOS firmware payload and then I good to go Ubuntu loaded nicely.

A second issue I ran into was that the full Ubuntu 16.04 install was just a bit too resource heavy for my now discontinued Acer Chromebook. Chrx comes with a variety of different distro installation options. I chose to go with GalliumOS. Gallium is built on Ubuntu and optimized for Chromebooks plus it has a very clean design.

My install of Apache, PHP, MySQL, and MongoDB all went smoothly so I have a nice and pretty responsive development environment. I have not really booted into ChromeOS since installing Gallium.

Thanks to reynhout for their work on chrx, MrChromeBox for the firmware script, and hugegreenbug the founder of the Gallium project. This is another example project demonstrating the remarkable power of open source software.

Categories
Analog Open Source Truck Projects ProjectSuccess

The Open Source Truck

The open source equivalent in a truck.

I went offline for project number 3.  I drive a 1991 GMC C2500 pickup truck.  I’ve owned this beautiful gold truck for about four years.  In it’s own, non-Internet-y way, the truck itself follows our ground rules.  It was cheap and paid for in cash (Rule #2).  You can buy a laptop for more than I spent on this. Whenever possible I try to do the work on it myself (Rule #1).  In many ways the truck is similar to open source software – it invites you to tinker, learn, and make it better.  It was built in an era when you popped the hood, you could actually see all of the mechanics laid out in a (mostly) logical way and without plastic covering everything. Thanks to my father-in-law and Truck-Mentor, Jim, we have done a lot of work together to breathe new life into this truck:

  • Replaced the radiator
  • New tires
  • New battery
  • New brake lines
  • New Bluetooth radio
  • Had the engine rebuilt
  • Cleaned the distributor cap
  • And now, replaced the headlight switch.

This particular project started with my daughter helping me do a quick oil change.  As she says, easy-peasy lemon-squeezie, but we didn’t stop there.  I noticed when I drove home from work on Friday evening that all of my headlights were out.  In being honest with Rule #5, being Honest and Transparent (HAT), I will admit to never having changed a headlight before.  So I thought this would be a simple project to learn.  But, in the back of my mind I thought it was odd that all the headlights were out at once.  I justified this by thinking maybe all the lights burned out slowly over time and I never noticed until they were all out. I did make a mental note though, that the light bulbs might not be the true issue.

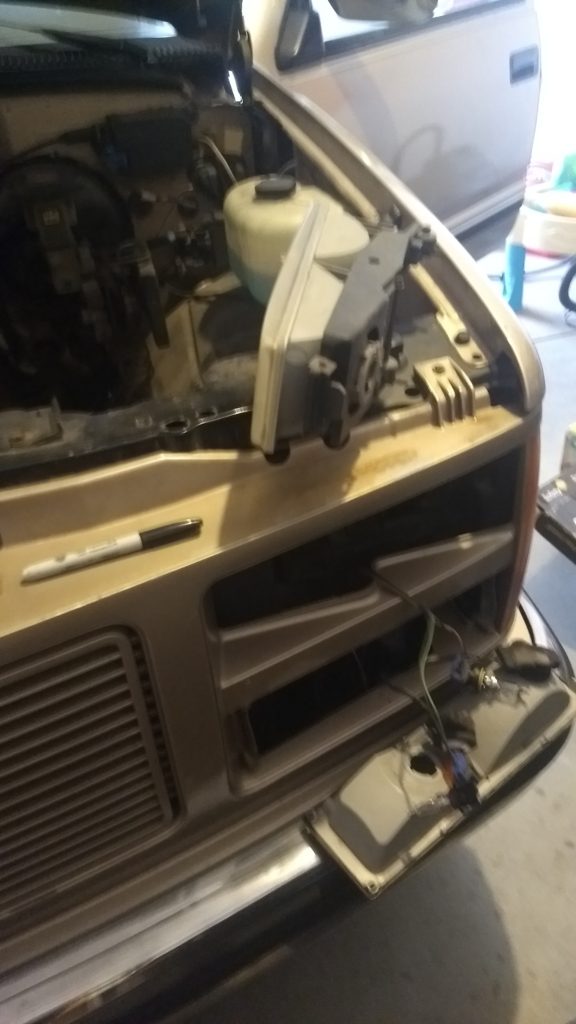
I picked up a wonderful and comprehensive Haynes manual for my truck a few weeks back.  I wish I had done this years ago.  It guided me seamlessly through opening up the headlights popping out the old bulbs and dropping new ones in.  After knocking this out, I fired up the lights and…nothing.  My mental note was affirmed.  This was going to be a multi-step project.

It was fun to open up the headlights and replace the bulbs, but it didn’t solve the problem.

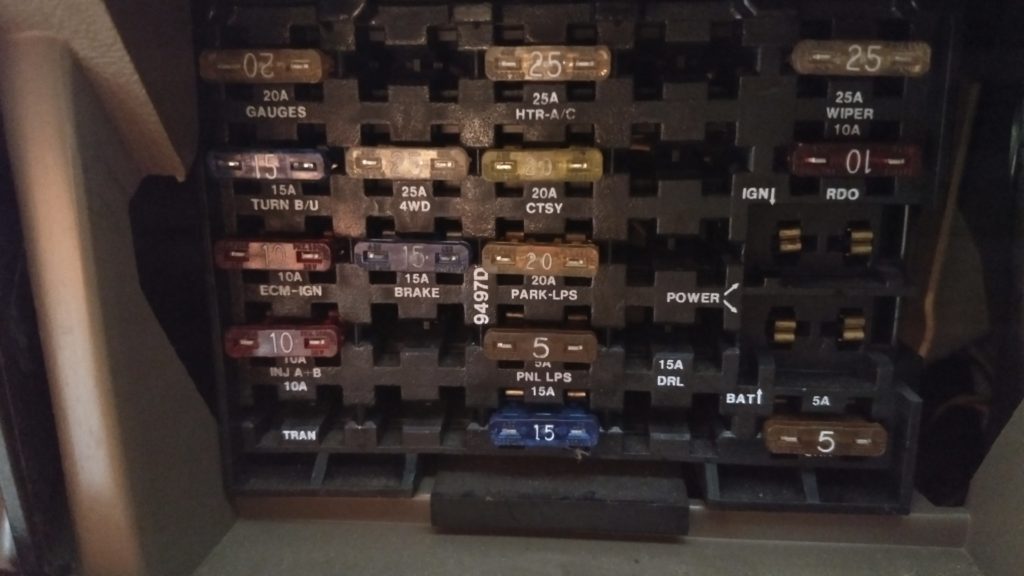
At Truck-Mentor Jim’s advice, the next step was to check to see if I had a blown fuse.  I never even thought about cars having fuses, circuits, and circuit breakers, but just like a house, they do.  The fuse box is conveniently located to the immediate left of the steering wheel and the fuses are labeled.  In the Haynes manual it included photos of good and “blown” fuses.  With a pair of needle-nose pliers I visually inspected each fuse to confirm they were all working.

Nothing wrong here. All fuses in good working order.

The fact that all the fuses were in working order was a good sign.  It meant if the bulbs and the fuses were working, the physical switch on the dashboard used to turn off and on the headlights had, after years of wear, stopped working.

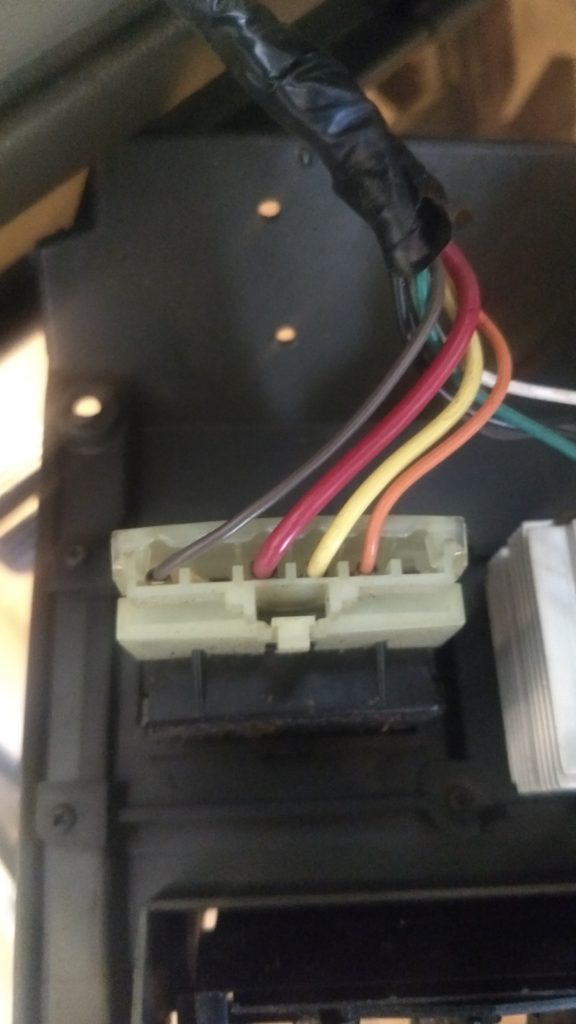
The back of the headlight wiring harness: Don’t blame me, I work just fine!

I unscrewed the dash cover and inspected the back of the headlight switch.  No sign of wear on the wiring or the harness.  I took a piece of soldering wire and bridged together the red and yellow wires to complete the circuit and the lights turned on!  This was a huge milestone which meant I could now drive my truck at night even if I had to Jerry-rig a bridge out of a paperclip or soldering wire while I pursued a permanent fix  Confirmed: the physical dashboard switch had failed.

A quick call to Auto Zone and $13 later and we are good as new.  We are still abiding by Rule #2, as low cost as possible.  I was amazed that Auto Zone had a part that was over 25 years old on hand and in stock and in the right color.  I shared my amazement with the clerk at the store and he said, “We have over $600,000 of inventory in this store and more than $200,000 has never been sold in the six years I’ve worked here.”  A rush of thoughts entered in my mind that he probably should not be sharing the value of the inventory with a random customer, but I was also amazed at what a treasure trove of parts must be  tucked away, never to see the light of day.  I also left wondering how Auto Zone makes a profit.

The old headlight switch. It was me, I’m the culprit!

I busted open the old headlight switch and found a gooey, sticky paste.  I’m not sure if someone else opened this up some time in the past and tried to patch it together or if after 25+ years this weird epoxy finally gave out causing the switch to fail.  I closed everything up and we’re back in business.  The truck has a fresh oil change, a couple of fresh light bulbs, confirmed the circuits are all working, and now it has a fresh headlight switch.

Learnings

I should have trusted my intuition when I first started the project.  All the headlights going out at once was a clear sign that something else was wrong.  I should have trusted my intuition and checked the fuses then the switch first.

The Haynes manual is a huge help.  This bad boy guided me through each phase of the project: opening the headlights, finding the fuse box and checking the fuses, and then opening up the dash and replacing the switch.

Stumbling Blocks

This project had a lot of them!  I am finishing up reading Zen and the Art of Motorcycle Maintenance.  I will write about the book in a future post, but it introduces these things called, Gumption Traps, which are so stinking relevant.

gumption trap is an event or mindset that can cause a person to lose enthusiasm and become discouraged from starting or continuing a project. The word “gumption” denotes a combination of commonsense, shrewdness, and a sense of initiative.

I was challenged by the following gumption traps.  Just being aware of them helped me to move past them not get frustrated.

  • It was cold in the garage.
  • Garage had too much stuff everywhere which I kept tripping over.
  • I didn’t have the parts so I had to run to the store.  Then I had to run back to the store.
  • One of the headlights had a stripped screw so it was impossible to open up.
  • Wrapped my knuckle trying to get a headlight out.
  • As with all things auto repair, the job took more than twice as long as I thought it would.

I did a good job adhering to Rule #4, and not rushing the job.  At the end of the project I cleaned up the garage and put all the tools away.  A small thing I know, but something I have always been terrible at.  In so doing, I consciously avoided creating another gumption trap for my next project.

Categories
Chromium Crouton FileZilla FTP Projects ProjectSuccess Ubuntu

Run Ubuntu Linux on a Chromebook

Project number 2 is in the can! I am now running Ubuntu Linux on my Acer Chromebook in a dual boot environment thanks to Crouton.  Actually, it would be more accurate to say that I am running Ubuntu Linux concurrently and on top of the Chromium kernel. This 11 inch 64 bit Intel white workhorse met my needs for casual browsing since I first bought it in April of 2015.  Great battery life, to boot. But, I expect that in taking on this year of development and the many technical projects I have in mind I need more horsepower.  So, in honoring Rule #2, rather than buying a new laptop or spending any money, I wanted to breathe new life into hardware I already had. Call it the classical approach to technology.  Since Chromebooks are already written on top of the Linux kernel, it made getting going with Linux pleasantly simple.

I followed these instructions and was pleased that more than a year later and they still worked without issue.  I chose to install Ubuntu with the Xfce desktop enviornment because it is fast and light on system resources.  It’s not much of a looker, but it is powerful.  Once I landed in the desktop I fired up the terminal did a quick

sudo apt-get install filezilla

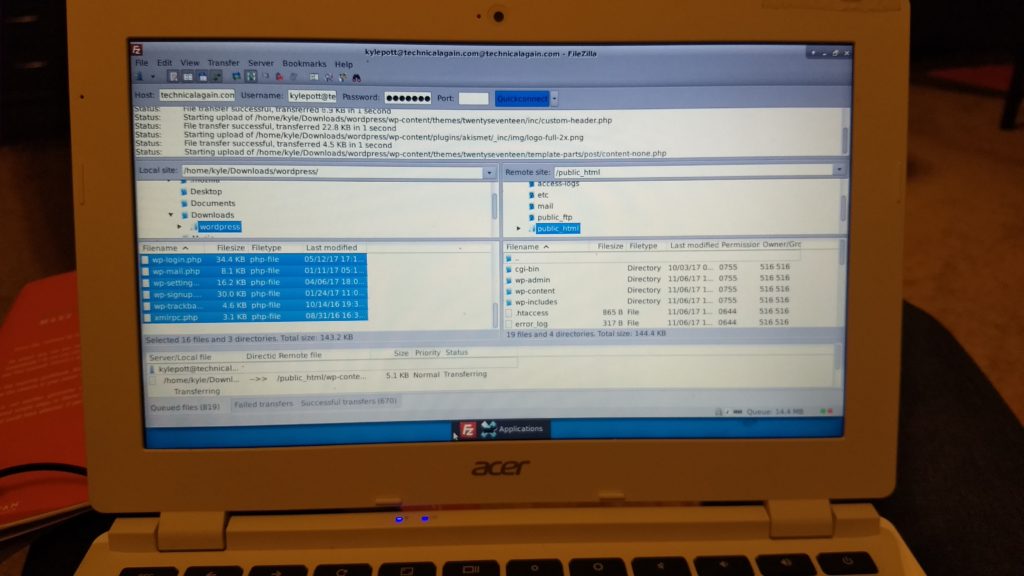
I installed the powerful FileZilla FTP client–much better experience than using sFTP which kept failing in Chrome.  Back in cPanel I created a new FTP user and I finished uploading WordPress.  Back in Ubuntu, I also grabbed Firefox

sudo apt-get install firefox

for a better browser experience and then I logged out.  On logout, Ubuntu closes and you’re brought right back to the session you left in Chrome.  I am loving having the simplicity of chrome right alongside the power of Ubuntu.  Now whenever I want to launch Linux I hit CRTL+ALT+T to launch the terimnal then:

shell
sudo startxfce4

Learnings

This was my first encounter with Crouton and it was a great experience.  Admittedly, I was unfamiliar with chroot.  From the GitHub, here’s a nice concise explanation and a quick pro/con analysis.

Like virtualization, chroots provide the guest OS with their own, segregated file system to run in, allowing applications to run in a different binary environment from the host OS. Unlike virtualization, you are not booting a second OS; instead, the guest OS is running using the Chromium OS system. The benefit to this is that there is zero speed penalty since everything is run natively, and you aren’t wasting RAM to boot two OSes at the same time. The downside is that you must be running the correct chroot for your hardware, the software must be compatible with Chromium OS’s kernel, and machine resources are inextricably tied between the host Chromium OS and the guest OS. What this means is that while the chroot cannot directly access files outside of its view, it can access all of your hardware devices, including the entire contents of memory. A root exploit in your guest OS will essentially have unfettered access to the rest of Chromium OS.

Thanks to David Schneider and the other contributors for his generous and amazing work on Crouton.

Stumbling Blocks

A few things where challenging on this project.  I didn’t read the instructions carefully enough the first few times and I had a difficult getting my Chromebook in developer mode.  The Chrome interface for develop mode was pretty intimidating and the bios made some of the scariest beeping sounds I’ve ever heard.  Besides that this project was pretty straight forward and clean.

I did manage to build more horrible identity management habits by not using a password for my sudo account in Chrome, having a riduculously guessable password in Ubuntu, and then reusing my same user ID and pass for FTP, host,  WordPress, and the WordPress database.  Keeping things easy for the hackers.  Just kidding, we are going to address password management in a future project.

Oh yeah, I also had to fight an acute, but strong desire to just buy a more powerful laptop.  Rule #2 grounded me.  I’m glad I fought that urge and enjoyed the classical challenge of giving this laptop a new future.

Categories
cPanel FileZilla FTP MySQL Projects ProjectSuccess WordPress

We landed here, on the internet, safely in one piece!

Our first project is in the can!  I call this project “Make a Website, Start Following Through on Your Development Plan.”

The first step was to find a domain name using Instant Domain Search.  I’ve been using this site for at least 5 years and it remains the fastest and simplest way to find a domain.

I then bought the cheapest hosting plan on Bluehost after hearing an advertisement on The Bill Simmons podcast.  Like Instant Domain Search, I have at least 5 years of experience with Bluehost.  I wanted a hosting plan that was basic, but would let me fully manage and run my own server including giving me the ability to experiment with a variety of programming languages and databases.  I bought the bear minimum services, opting for just a domain name, some basic hosting, and for 99 cents a whois proxy to keep my personal information safe.

The next step was to delete the default WordPress installation that Bluehost sets up, because of Rule #1: We prefer to build our own and then I uploaded my own version of WordPress.  I used cPanel to builtd a new database for the WordPress install.  For some reason, the user privileges on the default MySQL database on Bluehost were not working.  So I created a new database then created a new database user, linked the two together, and completed the World Famous 5 Minute WordPress install.

After some customizing and minimal-izing, here we are.  Along the way I had an impossible time getting the FTP Client to work on my Chromebook so I upgraded my Chromebook to Ubuntu (more on that in a few days).  I also introduced some horrible password and identity management behavior by reusing a subset of the same username and password combination to try to work fast, a violation of Rule #4.  I plan to clean that up in a future post when I explore using a password manager.

According to Rule #2: we always beep our costs low.  I fared quite well in this area walking away with a year’s worth of this website for $71.28.

On to project number two in a few days: detailing how I installed Ubuntu Linux on my Acer Chromebook.