Categories
aws ec2 ghost MySQL Projects ProjectSuccess Ubuntu WordPress

Ghost on AWS – success!


This is the third and final part of my first foray into AWS.  You can read part 1 and part 2.  AWS is great.  Getting access is secure and easy and you can’t beat free. AWS is incredibly quick at spinning up  new instances and once connected over SSH it is extremely fast – it rivals the feel of a local installation – almost no latency for me.

After getting Ubuntu installed, I spent the last few evenings attempting to install Ghost per these instructionsGhost is still an early work in progress. I had a lot of challenges. For example, the presence of a simple .config file blocked the installation until I deleted it.  During the installation, file premissions kept changing between my account and the newly installed Ghost account.  This is what ultimately blocked me completely.  No amount of chown or chmod adjustment would make Ghost work.  I tried every conceivable combination of ownership for /var/www/ghost including my account, the ghost account, and adding both to sudoers.  The only thing I stopped short of was changing the ownership to root which just didn’t seem appropriate.

I ended up abandoning my own attempt to install Ghost and instead tried out the Bitnami installation of Ghost.  This is a pretty cool capability within AWS – essentially an “app store” with Amazon Machine Images (AMIs) that you can install for free (or purchase).  The AMIs are customized for single or multiple needs.  In my case, Bitnami created a custom AMI with just Ghost installed.  I spun it up and had Ghost running in under five minutes.  All configuration worked out of the box – even punching a hole in UFW – Uncomplicated Firewall so you can navigate to the browser right out of the box and Ghost just works.  That is pretty cool! It would be great for the Ghost team to launch their own AMI instead of relying on Bitnami. I think Automattic should consider doing the same with WordPress.

Thoughts on Ghost

Ghost is built with a a good value proposition in mind: a more modern and faster architecture than WordPress and keeping the feature set to just the essential.  I agree that over time WordPress has developed some bloat – both in terms non-essential features and UI clutter.

Ghost has a few drawbacks that I’m sure the team is working on.  For one, the installation process needs to be streamlined.  I’m pretty proficient at Linux having over 15 years experience with Ubuntu and I couldn’t get the install to work.  There is a wide gap between the installation process for Ghost and the “World Famous” five minute install for WordPress.

The universe of available hosting platforms is very small.  I can understand this approach because Ghost is basically betting big on AWS – which makes sense to me.  The architecture of Ghost has a few drawbacks in my opinion.  For example, to install a new theme you have to reboot the server.  Not surprising, but since Ghost is so new, the ecosystem of plugins, themes, and other capabilities is nowhere near the universe of extensions available to WordPress.

In general, the UI and blogging experience is clean and simple, but not remarkably different than WordPress, in my opinion anyway.

A few benefits worth noting.  Relative to my current situation, Ghost on AWS allows full control of the server.  From a security perspective, this would allow me to control and monitor the entire server and firewall configurations.  That moves the responsibility for controls from my hosting provider to me.  I would like that.  As with all AWS appliances, Ghost has the potential to be a fair bit cheaper than a traditional WordPress blog on a regular domain host – but that depends hugely on the amount of traffic and purpose of the blog.

In total, Ghost is an interesting idea, I really like how it is “designed” for AWS.  But the install is too complex, the architecture needs some continuous improvement and the ecosystem needs to keep growing.  I would consider this project more frustrating than fun – messing with file permissions over and over not really all that enjoyable! For now I won’t be migrating this blog over to Ghost, but I’ll keep an eye on how the product matures over time.


Categories
Server Ubuntu

Setting Up A New Ubuntu Linux Server

I have plans to start a second open source project that will need a server so over the past few days I re-purposed an old Windows laptop into a server running Ubuntu Linux.

The installation was a little tricky because after I downloaded the Ubuntu installation file, I discovered that the DVD burner on this old laptop was no longer working. Instead, I needed to create a bootable USB. Rufus is a great utility that made this very fast and easy.  I deleted an old recovery partition, added a 1 GB swap partition for virtual memory and loaded Ubuntu into the remaining free space.  I preserved the Windows partition and can now dual boot between the Ubuntu and Windows operating systems.

I created a new user account and landed on the third rung of the Password Ladder.  I configured SSH to access the server remotely and I am good to go.

I plan to make a few more configuration changes so the server stays awake persistently. I plan to turn off the Ubuntu GUI and configure the SSH server to start on login.  For now I’ve got enough traction to get started on my open source project.

Categories
chromebook chrx Projects ProjectSuccess Ubuntu Uncategorized

Dual Boot GalliumOS on a Chromebook


I had some success running Ubuntu on my Chromebook through Crouton, but I started running into issues. My hypothesis is that since aspects of the Linux kernel are shared between ChromeOS through chroot with Crouton, I couldn’t get a clean installation of Apache to run. I assume this was due to permissions. So I set out on yet another Linux adventure to do a true installation of Linux on the Chromebook.

I found a nice utility called chrx that made the installation very straight forward.

Installing Linux via chrx onto a new (or freshly recovered) Chromebook is a two-phase process:

The first phase reserves space on your SSD or other storage device for the new operating system, and then reboots.

The second phase installs your chosen distribution, and configures the new system according to your selected options.

The installation proceeded smoothly by typing the following into the terminal.
Run chrx: cd ; curl -Os https://chrx.org/go && sh go

Follow on-screen instructions to prepare your Chromebook for installation

Stumbling blocks

I have a Bay Trail chromebook. I should have paid more attention. I did not notice this the first time I installed so even though the install went smoothly, when I pressed CTRL + L to launch into Ubuntu, it was non-responsive and would boot back into ChromeOS. The issue was that I needed to update my firmware. I found this nice firmware update script. I chose the first option which installed the RW_LEGACY firmware with a newer/working/customized version of the SeaBIOS firmware payload and then I good to go Ubuntu loaded nicely.

A second issue I ran into was that the full Ubuntu 16.04 install was just a bit too resource heavy for my now discontinued Acer Chromebook. Chrx comes with a variety of different distro installation options. I chose to go with GalliumOS. Gallium is built on Ubuntu and optimized for Chromebooks plus it has a very clean design.

My install of Apache, PHP, MySQL, and MongoDB all went smoothly so I have a nice and pretty responsive development environment. I have not really booted into ChromeOS since installing Gallium.

Thanks to reynhout for their work on chrx, MrChromeBox for the firmware script, and hugegreenbug the founder of the Gallium project. This is another example project demonstrating the remarkable power of open source software.

Categories
Chromium Crouton FileZilla FTP Projects ProjectSuccess Ubuntu

Run Ubuntu Linux on a Chromebook

Project number 2 is in the can! I am now running Ubuntu Linux on my Acer Chromebook in a dual boot environment thanks to Crouton.  Actually, it would be more accurate to say that I am running Ubuntu Linux concurrently and on top of the Chromium kernel. This 11 inch 64 bit Intel white workhorse met my needs for casual browsing since I first bought it in April of 2015.  Great battery life, to boot. But, I expect that in taking on this year of development and the many technical projects I have in mind I need more horsepower.  So, in honoring Rule #2, rather than buying a new laptop or spending any money, I wanted to breathe new life into hardware I already had. Call it the classical approach to technology.  Since Chromebooks are already written on top of the Linux kernel, it made getting going with Linux pleasantly simple.

I followed these instructions and was pleased that more than a year later and they still worked without issue.  I chose to install Ubuntu with the Xfce desktop enviornment because it is fast and light on system resources.  It’s not much of a looker, but it is powerful.  Once I landed in the desktop I fired up the terminal did a quick

sudo apt-get install filezilla

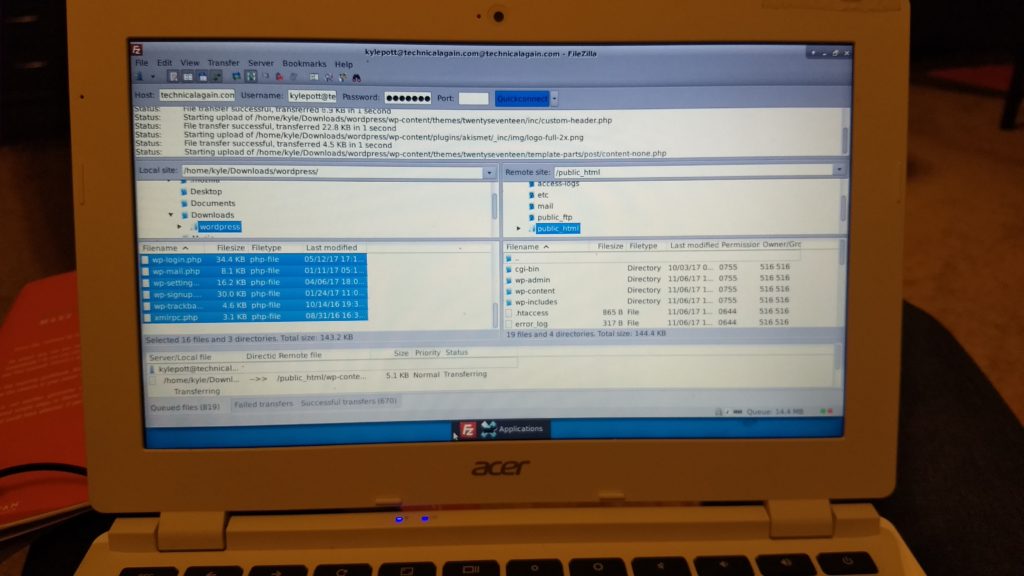
I installed the powerful FileZilla FTP client–much better experience than using sFTP which kept failing in Chrome.  Back in cPanel I created a new FTP user and I finished uploading WordPress.  Back in Ubuntu, I also grabbed Firefox

sudo apt-get install firefox

for a better browser experience and then I logged out.  On logout, Ubuntu closes and you’re brought right back to the session you left in Chrome.  I am loving having the simplicity of chrome right alongside the power of Ubuntu.  Now whenever I want to launch Linux I hit CRTL+ALT+T to launch the terimnal then:

shell
sudo startxfce4

Learnings

This was my first encounter with Crouton and it was a great experience.  Admittedly, I was unfamiliar with chroot.  From the GitHub, here’s a nice concise explanation and a quick pro/con analysis.

Like virtualization, chroots provide the guest OS with their own, segregated file system to run in, allowing applications to run in a different binary environment from the host OS. Unlike virtualization, you are not booting a second OS; instead, the guest OS is running using the Chromium OS system. The benefit to this is that there is zero speed penalty since everything is run natively, and you aren’t wasting RAM to boot two OSes at the same time. The downside is that you must be running the correct chroot for your hardware, the software must be compatible with Chromium OS’s kernel, and machine resources are inextricably tied between the host Chromium OS and the guest OS. What this means is that while the chroot cannot directly access files outside of its view, it can access all of your hardware devices, including the entire contents of memory. A root exploit in your guest OS will essentially have unfettered access to the rest of Chromium OS.

Thanks to David Schneider and the other contributors for his generous and amazing work on Crouton.

Stumbling Blocks

A few things where challenging on this project.  I didn’t read the instructions carefully enough the first few times and I had a difficult getting my Chromebook in developer mode.  The Chrome interface for develop mode was pretty intimidating and the bios made some of the scariest beeping sounds I’ve ever heard.  Besides that this project was pretty straight forward and clean.

I did manage to build more horrible identity management habits by not using a password for my sudo account in Chrome, having a riduculously guessable password in Ubuntu, and then reusing my same user ID and pass for FTP, host,  WordPress, and the WordPress database.  Keeping things easy for the hackers.  Just kidding, we are going to address password management in a future project.

Oh yeah, I also had to fight an acute, but strong desire to just buy a more powerful laptop.  Rule #2 grounded me.  I’m glad I fought that urge and enjoyed the classical challenge of giving this laptop a new future.